#4.0 Transitions (09:40) : Transition 적는 위치
<!DOCTYPE html>
<html lang="en">
  <head>
    <meta charset="UTF-8" />
    <meta http-equiv="X-UA-Compatible" content="IE=edge" />
    <meta name="viewport" content="width=device-width, initial-scale=1.0" />
    <title>Document</title>
    <style>
      a {
        color: white;
        background-color: tomato;
        padding: 3px 5px;
        border-radius: 5px;
        font-size: 55px;
        /* transition은 위 state 아래 적어야 함 */
        /* 적는 순서 : 무엇을 바꿀 지, 바꾸는데 얼마나 걸릴지, 어떤 형식으로 바꿀 지 */
        /* transition: background-color 10s ease-in-out, color 2s ease-in-out; */
        /* all : 무엇을 바꿀지 전체 지정도 가능 */
        transition: all 1s ease-in-out;
      }

      /* 변화 후 모습 */
      a:hover {
        /* a:active, a:focus도 가능 */
        color: tomato;
        background-color: wheat;
      }

      /*  */
    </style>
  </head>
  <body>
    <a href="#">Go Home</a>
  </body>
</html>
#4.1 Transitions part Two (07:45) : ease-in funtion
ease-in funtion 실습사이트
https://matthewlein.com/tools/ceaser
Ceaser - CSS Easing Animation Tool - Matthew Lein
Choose an easing type and test it out with a few effects. If you don’t quite like the easing, grab a handle and fix it. When you’re happy, snag your code and off you go. Now that we can use CSS transitions in all the modern browsers, let’s make them
matthewlein.com

ease-out : 끝에서 느려짐
ease-in : 시작을 빠르게 움직임
ease-in-out : 시작 느림 가속하여 끝에서 빨라짐
linear : 일정한 속도
cubic-bezier : 커스텀
#4.2 Transformations
개괄
회전
transform: rotateZ(60deg);
/* rotateY : 3D로 세로를 축을 기준으로 회전  */
/* rotateY : 3D로 가로를 축을 기준으로 회전  */
/* rotateZ : 시계방향으로 회전  */

크기 변화
 transform: scaleX(4);
/* scaleX(4) : 가로로 늘어남 */
/* scaleX(4, 4) : 가로 세로 모두 늘어남 */

이동
 transform: translateY(-20px);
/* translateY(-20px); : 세로방향으로 위치 이동 */

다양한 속성 동시 적용
transform: translateX(30px) scale(1.1);
전체코드
<!DOCTYPE html>
<html lang="en">
  <head>
    <meta charset="UTF-8" />
    <meta http-equiv="X-UA-Compatible" content="IE=edge" />
    <meta name="viewport" content="width=device-width, initial-scale=1.0" />
    <title>Document</title>
    <style>
      img {
        border: 5px solid black;
        border-radius: 50%;
        /* rotateY : 3D로 세로를 축을 기준으로 회전  */
        /* rotateY : 3D로 가로를 축을 기준으로 회전  */
        /* rotateZ : 시계방향으로 회전  */
        /* transform: rotateZ(60deg); */

        /* scaleX(4) : 가로로 늘어남 */
        /* scaleX(4, 4) : 가로 세로 모두 늘어남 */
        /* transform: scaleX(4); */

        /* translateY(-20px); : 세로방향으로 위치 이동 */
        /* transform: translateY(-20px); */

        /* 아래 hover의 transform에 transition 적용하기 */
        transition: all 2s ease-in;
      }

      img:hover {
        transform: translateX(30px) scale(1.1);
      }
    </style>
  </head>
  <body>
    <img src="img/iu.jfif" />
  </body>
</html>
도큐
https://developer.mozilla.org/ko/docs/Web/CSS/transform
transform - CSS: Cascading Style Sheets | MDN
CSS transform 속성으로 요소에 회전, 크기 조절, 기울이기, 이동 효과를 부여할 수 있습니다. transform은 CSS 시각적 서식 모델의 좌표 공간을 변경합니다.
developer.mozilla.org
주의사항 : translate는 다를 element의 box(padding, margin 등)를 무시하고 적용이 됨.
예시
transform : rotateY(60deg) 60도 회전시켰을 때


#4.3 Animations part One (04:52) : @keyframes
개괄
Anmation : hover 같은 거 없이 움직이게 하는 것
기본적인 애니메이션 코드를 다루어 보았다.
@keyframes animationname {
	from {
		transform: rotatex(0);
	}
	to {
		transform: rotatex(360deg);
	}
}

이런 식으로 애니메이션 코드를 작성 한 후 적용을 원하는 대상 요소에서
animation: animationname 5s ease-in-out infinite;를 넣어 실행시킬 수 있다.
실제코드
<!DOCTYPE html>
<html lang="en">
  <head>
    <meta charset="UTF-8" />
    <meta http-equiv="X-UA-Compatible" content="IE=edge" />
    <meta name="viewport" content="width=device-width, initial-scale=1.0" />
    <title>Document</title>
    <style>
      /* 에니메이션 옵션 설정 */
      @keyframes animationName {
        from {
          transform: rotateX(0);
        }
        to {
          transform: rotateX(360deg);
        }
      }

      /* 에니메이션을 적용 element 작성 */
      img {
        border: 5px solid black;
        border-radius: 50%;
        animation: animationName 5s ease-in-out infinite;
      }
    </style>
  </head>
  <body>
    <img src="img/iu.jfif" />
  </body>
</html>
#4.4 Animations part Two (07:27)
개괄
- from to 말고, 1,2,3,4,5...10 혹은 0% 25% 50% 75% 100% 같이 여러 단계로 나뉘어 애니매이션을 만들 수 있다.
- 다른 property들도 애니매이션으로 만들 수 있다. 꼭 transform만 써야하는 건 아니지만, transform을 쓰는걸 권한다.
일부 property는 애니매이션이 잘 안되기 때문이다.

@keyframes 애니메이션이름 {
	0% {
		}
	50% {
		}
	100% {
		}
}

opacity: 0; 는 아무것도 안보이게 함.
Animation Practice 실습 사이트
Animista - On-Demand CSS Animations Library
Animista is a CSS animation library and a place where you can play with a collection of ready-made CSS animations and download only those you will use.
animista.net
실제 코드
<!DOCTYPE html>
<html lang="en">
  <head>
    <meta charset="UTF-8" />
    <meta http-equiv="X-UA-Compatible" content="IE=edge" />
    <meta name="viewport" content="width=device-width, initial-scale=1.0" />
    <title>Document</title>
    <style>
      /* 에니메이션 옵션 설정 */
      @keyframes animationName {
        0% {
          transform: rotateY(0);
        }
        50% {
          transform: rotateY(180deg) translateX(100px);
        }
        100% {
          tranform: rotateY(0);
          opacity: 0;
        }
      }

      /* 에니메이션을 적용 element 작성 */
      img {
        border: 5px solid black;
        border-radius: 50%;
        animation: animationName 5s ease-in-out infinite;
      }
    </style>
  </head>
  <body>
    <img src="img/iu.jfif" />
  </body>
</html>
#4.5 Media Queries (11:21)
개괄
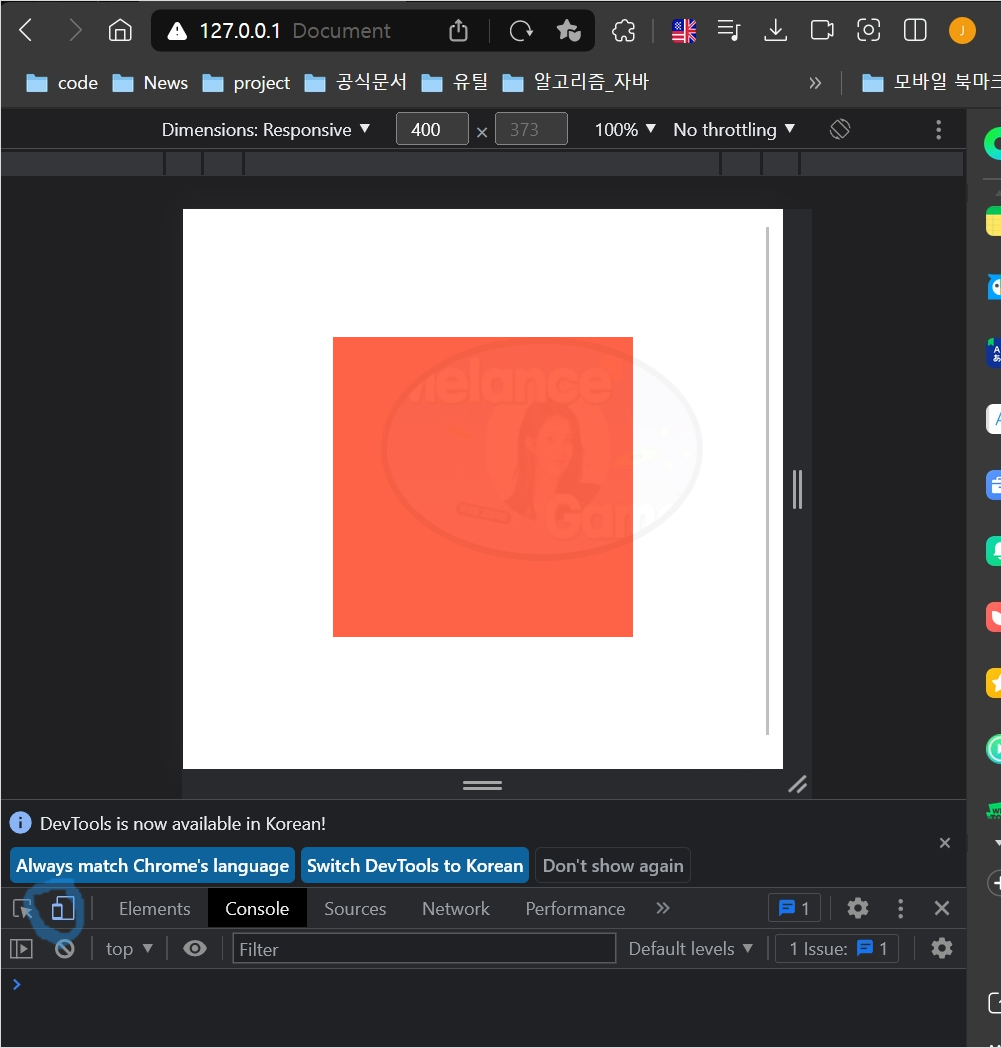
Media Queries : 오직 CSS만을 이용하여 스크린의 사이즈를 알 수 있는 방법. 즉 사이즈에 따라 CSS를 다르게 보여주는 데 사용
  /* 스크린 너비가 400px보다 작으면 div bg 변경 */
  @media screen and (max-width: 600px) {
    div {
      background: tomato;
    }
  }

  /* 스크린 너비가 550px보다 크고 750px보다 작으면 div bg 변경 */
  @media screen and (min-width: 550px) and (max-width: 750px) {
    div {
      background: tomato;
    }
  }

    /* 스크린 너비가 600px보다 작으면 div bg 변경 */
  @media screen and (max-width: 600px) {
    div {
      background: tomato;
    }
  }
  /* 스크린 너비가 501px보다 크고 1200px보다 작으면 div bg 변경 */
  @media screen and (min-width: 601px) and (max-width: 1200px) {
    div {
      background: wheat;
    }
  }
  /* 스크린 너비가 1200px보다 크면 div bg 변경 */
  @media screen and (min-width: 1200px) {
    div {
      background: turquoise;
    }
  }

    /* orientation: landscape 가로모드일 때 / cf portrait 세로모드 */
  @media screen and (min-width: 1200px) and (orientation: landscape) {
    div {
      background: turquoise;
    }
  }

    /* 가로모드일 때 span이 사라지게 함 */
  span {
    font-size: 36px;
  }
  @media screen and (orientation: landscape) {
    span {
      display: none;
    }
  }
도큐
https://developer.mozilla.org/en-US/docs/Web/CSS/Media_Queries/Using_media_queries
Using media queries - CSS: Cascading Style Sheets | MDN
Media queries allow you to apply CSS styles depending on a device's general type (such as print vs. screen) or other characteristics such as screen resolution or browser viewport width. Media queries are used for the following:
developer.mozilla.org
핸드폰 화면으로 실습하기

전체코드
<!DOCTYPE html>
<html lang="en">
  <head>
    <meta charset="UTF-8" />
    <meta http-equiv="X-UA-Compatible" content="IE=edge" />
    <meta name="viewport" content="width=device-width, initial-scale=1.0" />
    <title>Document</title>
    <style>
      body {
        display: flex;
        height: 100vh;
        align-items: center;
        justify-content: center;
        flex-direction: column;
      }
      div {
        background-color: teal;
        width: 200px;
        height: 200px;
      }

      /* 스크린 너비가 600px보다 작으면 div bg 변경 */
      @media screen and (max-width: 600px) {
        div {
          background: tomato;
        }
      }
      /* 스크린 너비가 501px보다 크고 1200px보다 작으면 div bg 변경 */
      @media screen and (min-width: 601px) and (max-width: 1200px) {
        div {
          background: wheat;
        }
      }
      /* orientation: landscape 가로모드일 때 / cf portrait 세로모드 */
      @media screen and (min-width: 1200px) and (orientation: landscape) {
        div {
          background: turquoise;
        }
      }

      /* 가로모드일 때 span이 사라지게 함 */
      span {
        font-size: 36px;
      }
      @media screen and (orientation: landscape) {
        span {
          display: none;
        }
      }
    </style>
  </head>
  <body>
    <div></div>
    <span>Please flip your phone</span>
  </body>
</html>
#4.6 Media Queries Recap (05:31)
정리하기
1. Media query는 원하는 css 조건을 추가할 수 있다.
2. Media query는 and를 써서 연결된다.
3. Min/max-device-wdth = 휴대폰 적용, 브라우저 미적용
4. Media type 중 print : 웹페이지를 print 할 때 css 지정 하는 것.

  /* 프린트할 때 CSS 설정 가능 */
  @media print {
    body {
      background: red;
    }
  }